Saturday, April 4, 2015

Weathered Geek Chic Sign

I got this hair-brained idea that I wanted an old, weathered hand painted sign for our nerd cave in our basement.  I found lots of great looking signs online and at Hobby Lobby, but the subject matter was a problem.  I was looking for something very specific...a sign that could have hung outside the cantina in Star Wars....you know, the scene where Han shoots first?  That's the one.  After thinking about hiring a professional sign painter, I decided to try to make it on my own.  I read up on weathering wood on Pintrest and decided to try the tea/vinegar/steel wool solution.  I started by brewing the tea and the vinegar and steel wool solution, sanding the wood, then painting the tea on.  If you're doing this on your own, it doesn't change the color of the wood, you're not doing it wrong.  

I painted a test board with multiple coats on different parts of the wood.

 I let the jar of vinegar and steel wool soak over night.  Then I painted it on the wood.  I didn't see much of a difference between the 1 and 2 coats of tea, but the 2 coats of vinegar solution is definitely more brown.  I was looking for more of a grey look, so I opted for one coat of vinegar.
 
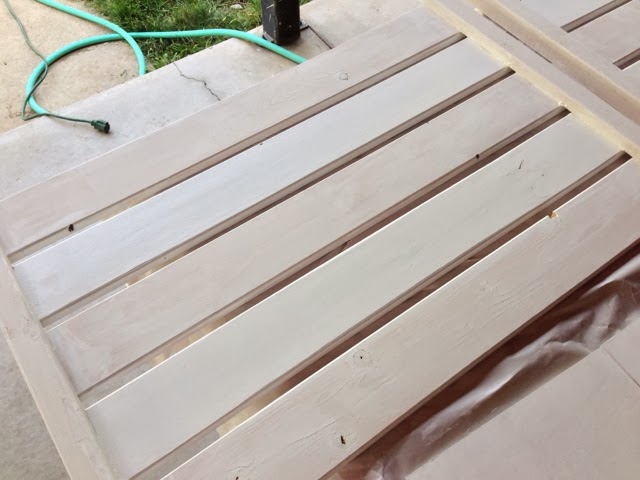
 After the vinegar solution, I did more testing.  I used whitewash, painted some white and sanded it off, put stain over top of the paint, all just to find the look I liked. 
 I ended up going for painting the boards white, then sanding it off with an orbital sander.
Afterwards, we used some brackets from the hardware store to mount them together and hang them on the wall.
Then it was time for the hard part.  I spent hours creating the text of the sign in Gimp (finding the right fonts, the shadowing, and the curved text took me a while).  I then had my dad help me cut it in vinyl.
 Then came the paint.
After, I sanded the words a little by hand.
 I'm thrilled with how it turned out.  It's just what I was looking for.
 To see more of the nerd cave, see our renovation blog.

Monday, December 29, 2014

Christmas Totes

I love to make Christmas gifts.  I usually don't have the time to make anything elaborate, though, so when I saw this tutorial for tote bags on Pinterest, I thought I'd give them a go.  I decided it would go faster if I did it in more assembly line fashion, so I bought all my fabric and cut everything out first.  Then I took a surger to them and they were done within a matter of a few hours.

I love how they turned out.  Once I finished sewing the bags, and since I don't own a monogramming sewing machine, I used my dad's vinyl cutter and heat press to cut out gold monogram letters to personalize each bag.


I folded them up and rolled them instead of opting to wrap them.  This project really was quite easy and turned out surprisingly cute!

Friday, October 31, 2014

Wonder Woman

 It was a super hero kind of Halloween this year.  When Skeeto said he wanted to be Spiderman, I decided to punt and buy him a costume.  But I was NOT going to pass up a change to make a Wonder Woman costume!  As usual, it was a collaboration with my Mom which means she does most of the hard work :)

The cape was amazing.  Now, you might be thinking....Wonder Woman didn't wear a cape.  Oh contraire!  And I think we nailed it!

We also opted for a skirt.  Izzypop wasn't too keen on wearing underwear to school.  But we can even call that authentic :)

Needless to say it was a SUPER Halloween!  We had such a great time.  Giant thanks to grandma for helping to pull off another great year!  Love you!


Monday, October 20, 2014

Hansen Halloween Vol 3


The Third Annual Hansen Halloween Craft Extravaganza was a success!  We had a great time together making Halloween books.  I had tried some out last year and we decided that would be our theme this year.


The kids had their own Halloween gingerbread houses to construct.
We had some amazing creativity going on.  Everyone's ended up surprisingly different.


Here's Ashee's.


And Ashley's for Ax and Max.

Shereen's potion book may be my favorite!

Jess had a genius idea to put one kind of tissue paper down first, the put another color over it and peel it off in certain places.  So cool.
Even Izzypop did her own.....while eating some sort of chocolate product :)
Mom's ended up looking really cool.  She used some really cool textured papers to wrap the bindings.
I wanted to add to my Harry Potter potion table, so I made this one this year.

It looks great with the rest of the HP goodies!


I had such a great time.  Thanks ladies for being the most awesome family ever!


Monday, July 7, 2014

4th Flag


First I took a leftover shelf from IKEA and painted the entire thing white.  I then put a second coat of white on the second and 4th slats.  Afterwards, I wrapped the second and fourth slats with paper to protect them from the red paint and painted the other three slats red.
 

I then painted a wooden 4, a 1/4 inch 7x7 square and a wooden star white.  The 4 and the square got a coat of blue on top of that.
 

Then I sanded all pieces and glued them together. A little jute string for a finishing touch.

Friday, February 14, 2014

Cute As A Button Valentines.

I decided to make Valentines for the Young Women this year.  I wanted something easy, cute and NOT food!
 
These button earrings did the trick.  I had some extra fabric and bought the covered button kits from amazon.  Glued some earring backs on the buttons, made a cute little card and that was it!  I'm just ticked I didn't have any left over for me!