Monday, December 30, 2013

Christmas Gifts for the Gals

I saw this craft at Wood Connection and loved it.  I bought the wood there, but made my own vinyl stencils since I was making so many.  Also made my own tags. 

I used the same paper on the back that I used on last year's countdown calendar gift to my YW leaders so they would match.

 I thought as long as I was making gifts for people, I might as well make one for myself.  This 12 days of Christmas sign has to be the easiest craft from Wood connection ever.  Paint the back black.  Glue the 12 days printout on the wood, then use texturing cream to make it look like a chalkboard.  Literally a 15 minute craft.  I put it in the kitchen to add a little Christmas spirit there.

Thursday, October 31, 2013

Halloween Unconventional Challenge

I used to watch Project Runway religiously before we got rid of cable.  I loved the unconventional challenges.  The creativity always blew me away.  How could anyone make anything out of dollar store items?  And who would want to???  Well, these crazy people, that's who.  We started with anything we could find that was red from the dollar store.  Cups, dish drying racks, buckets, flashlights, anything.

 Then, in true Project Runway fashion....it was chaos for a couple days.
Glue guns, velcro, yelling, crying....complete chaos.

But I'm proud to say, we "made it work." :)

 And this little twerp couldn't be happier.  Even his sister, Merida, approved.

Saturday, October 26, 2013

2nd Annual Hansen Halloween!

We had so much fun last year, that we just had to do another Hansen Halloween Craft Extravaganza!

This year, the aunts, cousins, Grandma and our newest official member, Jess, decided to try our hands at potion bottles.  We had a great time just hanging out and chatting while we worked.

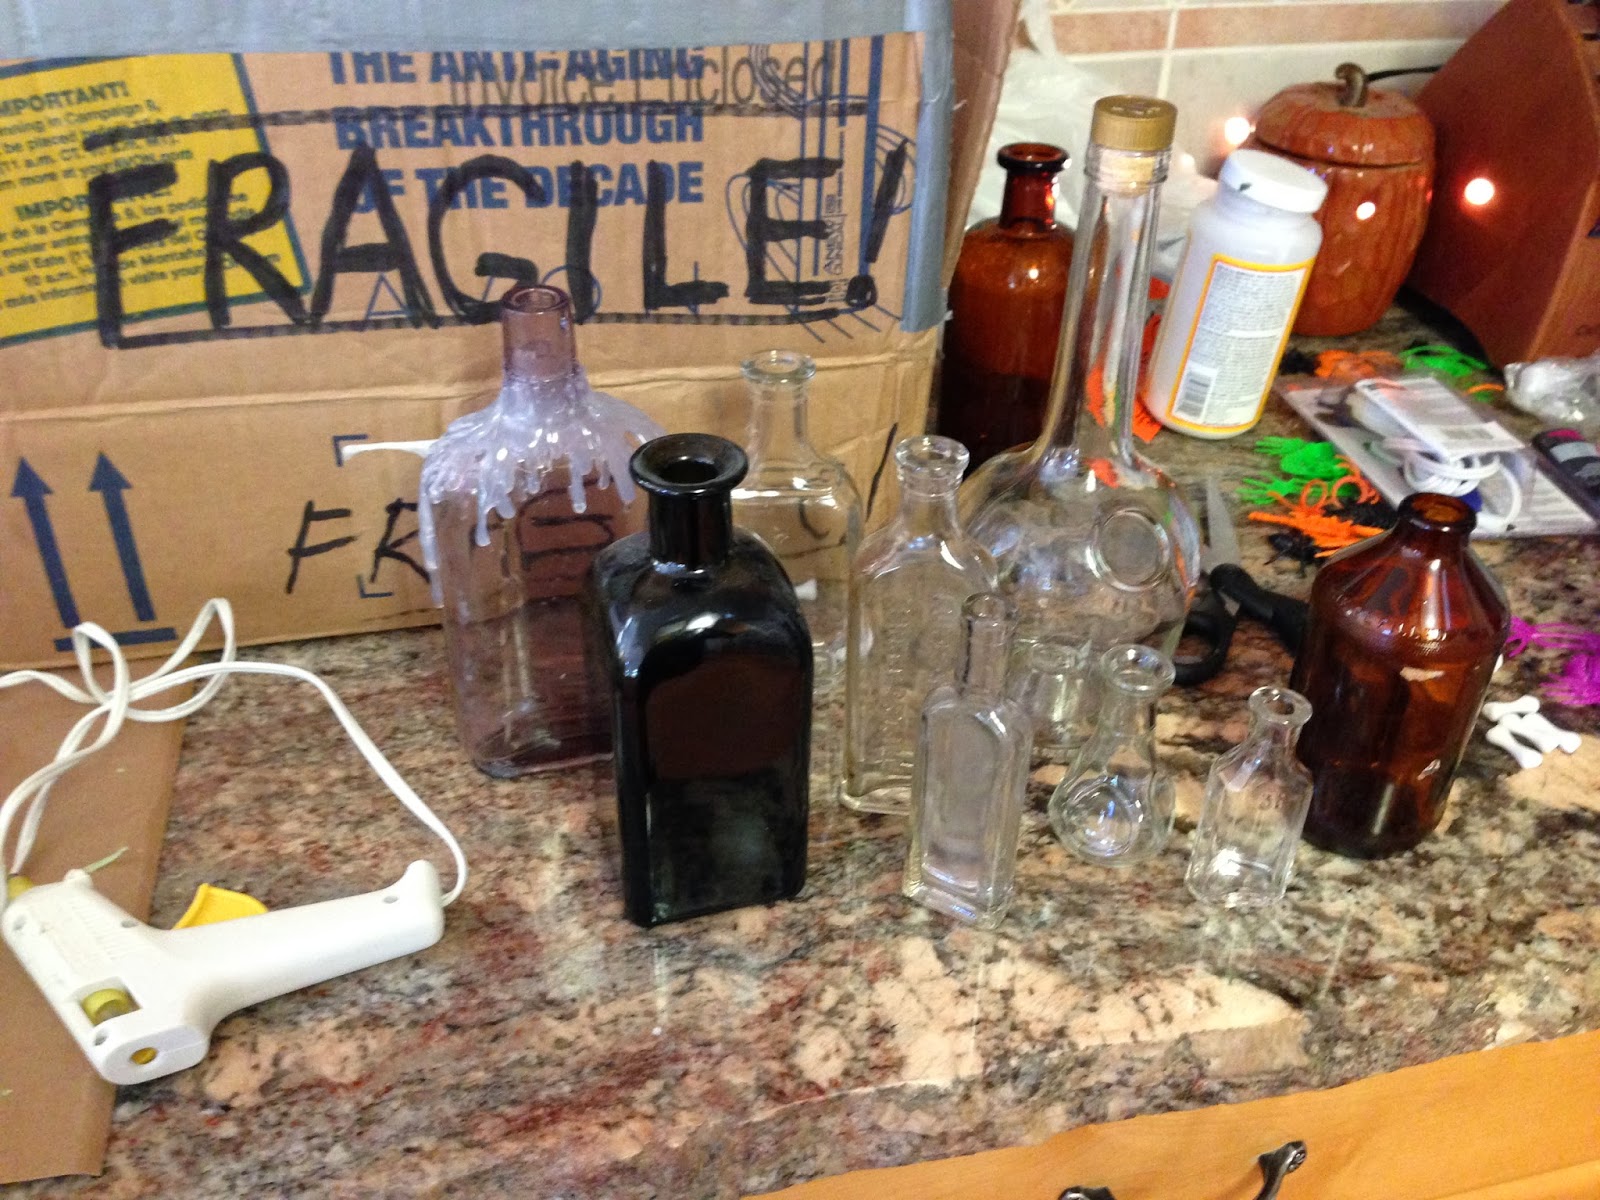
We started with a bunch of empty bottles we collected from various places.  I bought a lot of really old ones off ebay for all of us to pick from.  I decided to drip hot glue from the top of a couple of mine.  Once they are painted, they look like melting wax.

Once the bottles were prepped, we spray painted them.  We had all kinds of colors: black, white, purple, metalics, etc.  Once they were painted, we added labels we mostly found off the internet combined with Halloween scrapbook paper, embellishments and corks from Hobby Lobby.


We love the final results!!!  I only got pictures of a few sets, but here they are:
First Ashley's

And Shereen's

Grandma Yo-Yo's

Even the kids got into some potion action!  Here are Axel's, Lizzy's and Saylor's.

Here are Callie's

And finally mine.  Since I'm a Harry Potter nerd, all my potions are from HP.  I have Essence of Dittany, Draught of Living Death, Acromantula Venom, Felix Felicis, Wartcap Powder, Amortentia, Veritaserium, Mandrake, and, my personal favorite, Skele-Gro.  For the Skele-Gro, I used the same hot glue technique as on the other bottles, but I added little plastic skulls and bones that I had found at Michaels.  After that, I painted the bottle off-white and dry brushed a little brown over the top to make it look old and dirty.


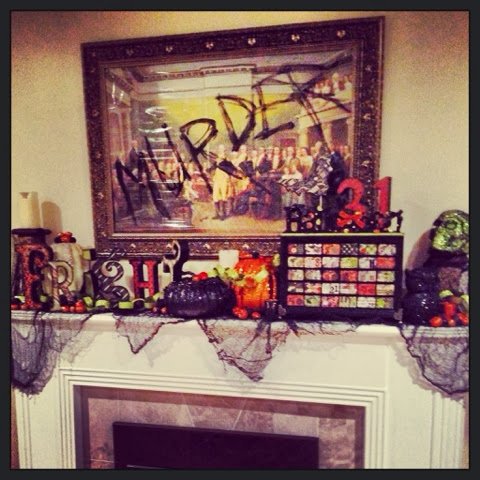
Mom got a jump start on us and created this amazing display for her upcoming work party.  She's going to be a creepy candy lady.

She made all her own labels, of course.  Show off!  ;)

After taking mine home, I put them in the front room with the rest of the Halloween treasures.  While we were making potion bottles, I decided to also make these books (which may have to be next year's project).  I used the tutorial I found on Pinterest here.  In the tutorial, she uses paper towel, but I used tissue paper instead and it worked great.

Here are a couple more pics of the books.  We are definitely doing this next year!


Friday, October 18, 2013

Halloween Mantle

Love my Halloween mantle this year.  Everyone seemed to love the painting.  All I did was paint on clear cellophane and tape it over our normal painting.  Turned out great.

Wednesday, October 2, 2013

This Or That?

I was in charge of the activity this week for Young Women.  We were welcoming two new girls into the group so I wanted to plan some kind of get-to-know-you game.  I found a couple ideas online and decided to combine them.
 
First, I took a bunch of tongue depressors and wrote two words, one on each end, which the girls would have to choose between.  Some examples were "Chocolate" or "Vanilla", "Cats" or "Dogs", and "Facebook" or "Instagram".  I also took some yarn and wound it into a ball.  The container is just a No. 10 can wrapped in washi tape.
 
I tied the end of the yarn to my wrist and picked a stick.  I can't remember the exact stick I picked, but lets say it was "Fame" or "Money".  I chose "Money".
 
The next step was to ask who agreed with me.  Everyone who agreed raised their hands.  I then threw the yarn to someone with a raised hand.  They put their had down, wrapped the yarn around themselves and threw it to someone else with a raised hand.  This continued until no raised hands were left.  At that point, the person with the yarn chose another stick and the game continued.

Pretty soon, the yarn had woven quite a web illustrating that we are all connected in some way.
 
I was pretty nervous going into the game.  I figured everyone would love it or it would be a huge flop.  Surprisingly everyone had a blast and really enjoyed themselves.  It was great getting to know everyone a little better and it was a perfect introduction for the new girls to the group.
 P.S.  You may want some scissors on hand for the end!


Thursday, August 29, 2013

It's Better With Chocolate

This week for a Young Women lesson, I used Dove chocolates to enhance my handouts.  They come in almost all of the colors of the values. (I painted the milk chocolate with almonds gold for Virtue).  I also love that each chocolate has an uplifting thought inside the wrapper.  Perfect for my girls!

Friday, May 17, 2013

Personal Progress -- Washi Style

A lot of the projects I undertake have to do with me being a counselor in Young Women.  I was in charge of the Personal Progress activity recently and I decided we'd try our hand at washi tape.


We started with these white frames from Ikea.  You can't beat $1.99.  Especially when you have to buy a dozen of them. 

Next, I bought a bunch of different colors and designs of washi tape from this shop on etsy. I had the girls wrap their blank frames in whatever pattern they liked.  It was really easy to do and only took the girls about 30 minutes. 

Afterward, I brought all of them home and put a coat of Mod Podge on them to keep the tape from peeling.  It wouldn't stay stuck very well otherwise.

I wanted to make sure that each girl had a special picture to put in the picture frame.  So, during the same activity, we had each girl sit in front of a whiteboard and the rest of the girls wrote positive words that described that girl.  This went along great with PP Individual Worth Value Experience 7.  We used all different colors of dry erase markers to make it colorful.  We have a few artists in our group of girls and they drew cute little pictures too.  We tried to let the girls run with it and they did a great job making them cute and colorful. 

 
For the girls that weren't able to make it to the activity, we wrote their names on the board and wrote the words around them.  When we were done, I snapped a pic and erased the board for the next girl.  Then I took the pictures home and put some cool filters on them.  Some have galaxy overlays on them.  Some look like they're splattered with paint.  Some look like vintage photos.  Each picture is different and has a fun vibe to it.


I ended up having one extra frame so I decided to do one for my outgoing advisor, Maren, who is getting married.  In this case, I used Power Point to create the picture for the frame.  I downloaded a bunch of really cute fonts and made sure that each word used a different one.  I chose colors close to her wedding colors and changed the orientation of the words so they'd fit in a nice little square.  It was remarkably easy and I *love* how it turned out!


All in all, this activity worked out great.  It was easy and fun for the girls and they will have something to always remind them how amazing they are.  Plus, they passed off a personal progress experience!  Bonus!


Friday, January 4, 2013

Halloween Scrapbooking

I know. I know. YES we are just getting around to doing the Halloween scrapbook pages for the kids. Someday we will be all caught up with everything. But today is not that day. As for now, I am happy with our progress. My mom helped me with these as always. She did Nate's by herself. I always need help. And I am grateful for it. :-).

This was our first crack at the distressed look. We used a lot of the Tim Holtz stuff that we have collected. We also made some good use of that leftover Halloween paper from our wooden letters projects. Love how they turned out! Thanks, as always, Mom.